Showing posts with label how to. Show all posts

Monday, November 26, 2012

Magic: The Gathering- An Advent Calendar

I had no idea what to get my eleven-year-old brother for Christmas. After brainstorming for a while, I decided that I wanted to get him a LEGO Star Wars Advent Calendar, but I wasn't really willing to fork out fifty bucks for twenty or so dollars worth of pieces.

I really like the idea of giving him an advent calendar. And after coming home from college to "DANI! I WENT TO THE COMIC BOOK STORE TODAY! LOOK AT THE CARDS I GOT!", I knew that I must make him an advent calendar that would feed his new addiction- Magic: The Gathering.

I bought a Deck Builder's Toolkit of Amazon for $15. Kareshi helped me sort the cards into twenty-four categories, one category for each day in December until Christmas.

The first envelope is a wrapper to a booster pack. This was Kareshi's idea. He thought I'd be good to make my brother guess what the other envelopes were. Surprisingly, my brother didn't notice the colors of the tree "ornaments"- mana! Envelope 2 contains the tokens from the booster packs.

3 - 8: Land
9 - 20: Each contain a "set" of 3 or 4 cards. Angles, vampires, birds, werewolves, etc.
21 - 23: Double-Faced cards (which my brother loves), Rares, and Mythic Rares.
24: Booster pack!

Day 25 will be his actual present under the tree- the rest of the cards from the toolkit, along with the box it came with.

I can't wait for the first of December to come!


Sunday, July 15, 2012

I'll be the Princess, and you be Mario.

 
I have this friend that I'm pretty close to. We pretty much spend every day together, and he's amazing. I wanted to make him something cool to remind him how important our friendship is.

What I used:

Clear Shrinky Dink Paper
Cord
Skinny Black Sharpie
Colored Pencils

This template, printed out on a piece of letter size paper:  Link
The circle has a circumference of about two and half inches.

Tools:

Oven
Cookie Sheet
Sand Paper
Scissors
Hole Punch

The process is really quite simple. Sand the clear shrinky dink paper in a cross hatch pattern. Place the shrinky dink paper on top of the pattern, and trace Mario and Peach with the sharpie. Color them in anyway you want. Cut out the circle, punch a few holes in the top, and stick it in the oven according to the directions on the package. (Most Commonly: Bake for 1 to 3 minutes at 325 degrees Fahrenheit) Let it cool and tie your cord on it. Ta-da!


I am very happy with how these turned out. I think he is very happy with them, too. [=

Team Tom Hanks: Coasters

I know I ramble about Team Tom Hanks a lot. But let me tell you- they're awesome people.
(See: Link and Link)

Well, to honor their awesomeness, I wanted to give them all something sweet for graduation. So I made them all Tom Hanks coasters. 


I made eight sets of these suckers for the gang. And I think they really like them. XD

The idea came from "Carrot Top Mom"- an awesome blog filled with a family's memories, crafts, recipes- everything. Her coaster "how to" is perfect.
Link 
Be sure to check out the rest of her blog while you are there!

Tuesday, May 29, 2012

Skill Check! -d20 Plush-


A couple of weeks ago, I was playing Dungeons and Dragons with some friends of mine. For our first encounter- I was up first, playing a wizard. And being a wizard, I pull out my crossbow, of course, to shoot at the creature before us. XD Preform a skill check- rolled a natural twenty. XD

I rolled THREE other natural twenties that evening. Another guy rolled two. It was just a good night for all of us.

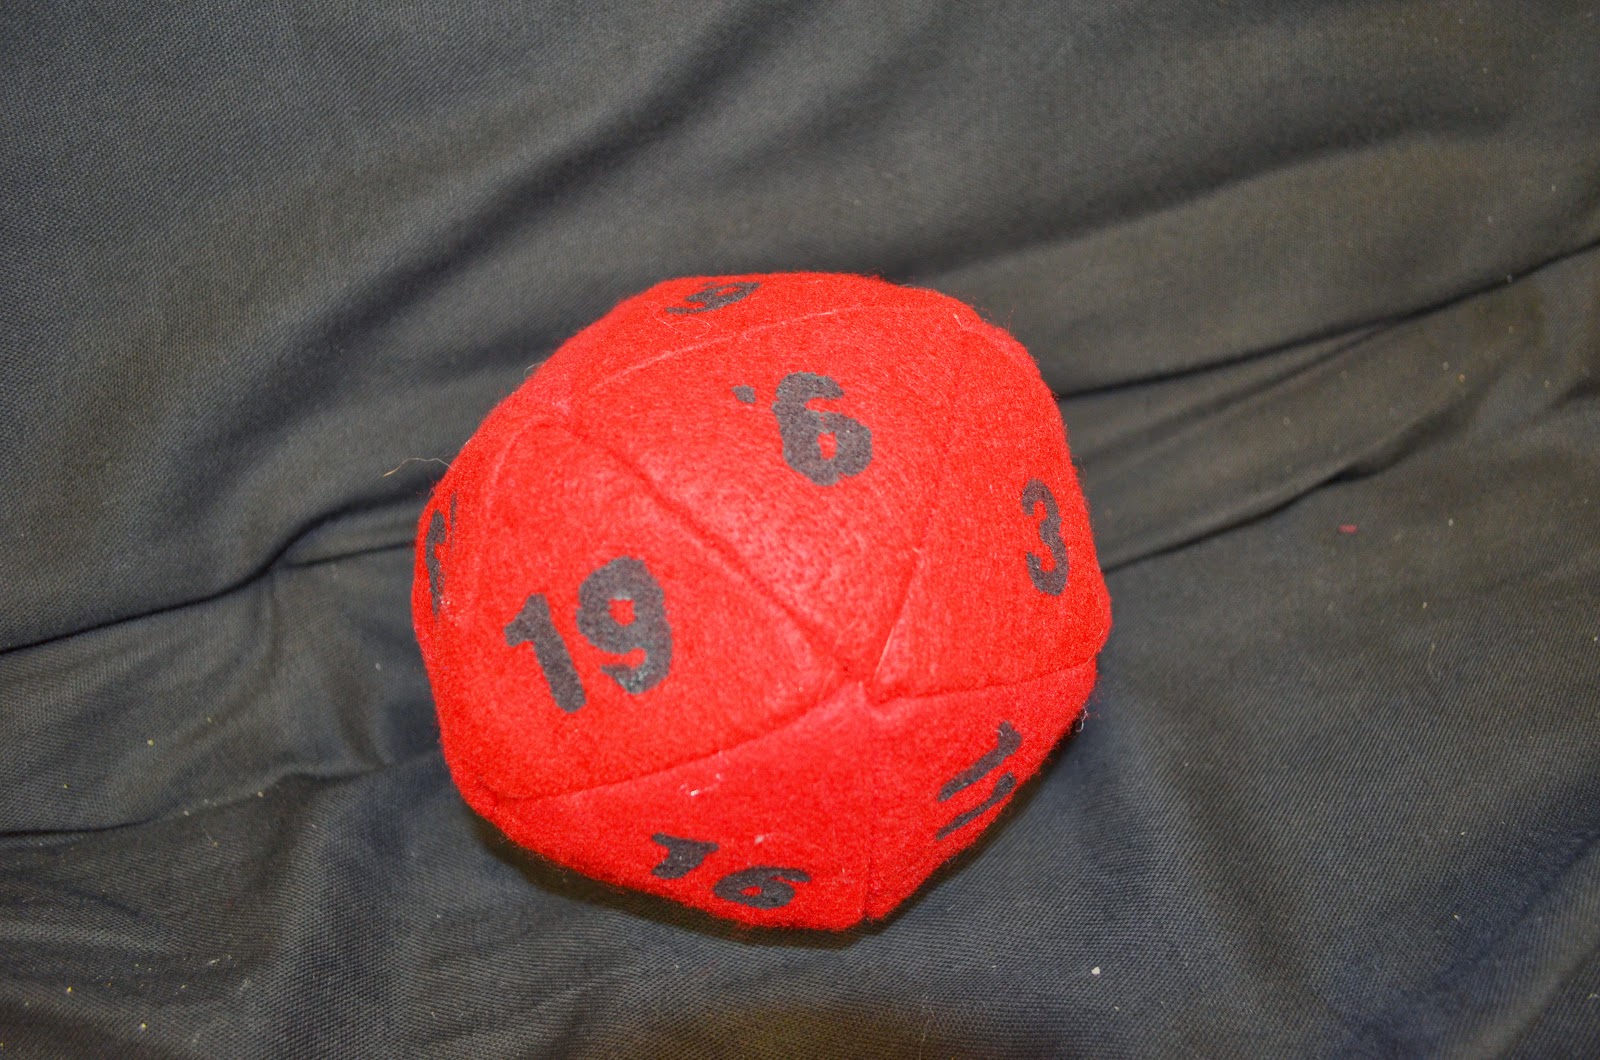
I thought it’d be fun make a plush D20. Plus, if you throw this D20 when a skill check doesn’t go the way you want it to, it won’t hurt anything... or anyone. XD


I based the plush off Evil Mad Scientist's "d20 Handbag of Holding". Link
I used their "large pattern". If you are looking at the pattern, you'll notice there are two different sized triangles for the stiffener pads. I only made one size of triangle.


I made my own stiffener pads by attaching interfacing and heavy weight quilt batting with Loctite general performance spray adhesive.


I used very thin beads of hot glue around the corner of the stiffener pads to attach them to the felt pieces.


I found an old stencil in my main floor craft shelf. It worked pretty well for painting on numbers! I had to wash the stencil in between each number though, otherwise the paint would make too much of a mess.

I'm sorry to say- I lost the pictures I took while sewing the pieces together. I'm very sorry. But how I sewed it together was simple. I used a print-and-fold dice as a guide. Link It took focus, but it really was not hard. Then, I simply stuffed it like you'd stuff any other plushie. XD


The crazy thing- my DM was over to hang out yesterday after I finished this.
He picked it up, rolled, and got a thirteen.
I picked it up, rolled, and got a twenty.
XD

Magic Life Counter

A dear friend of mine recently taught me how to play Magic: The Gathering.
Even though I don't have any sweet Planeswalker-skills [yet], I'm totally in the game and I can't wait until I have some extra cash to start buying and building decks and such.

Speaking of buying decks- I was browsing the Internet today, looking for life counters.
The life counters that Wizards of the Coast are making right now:
Photo Cred: Link
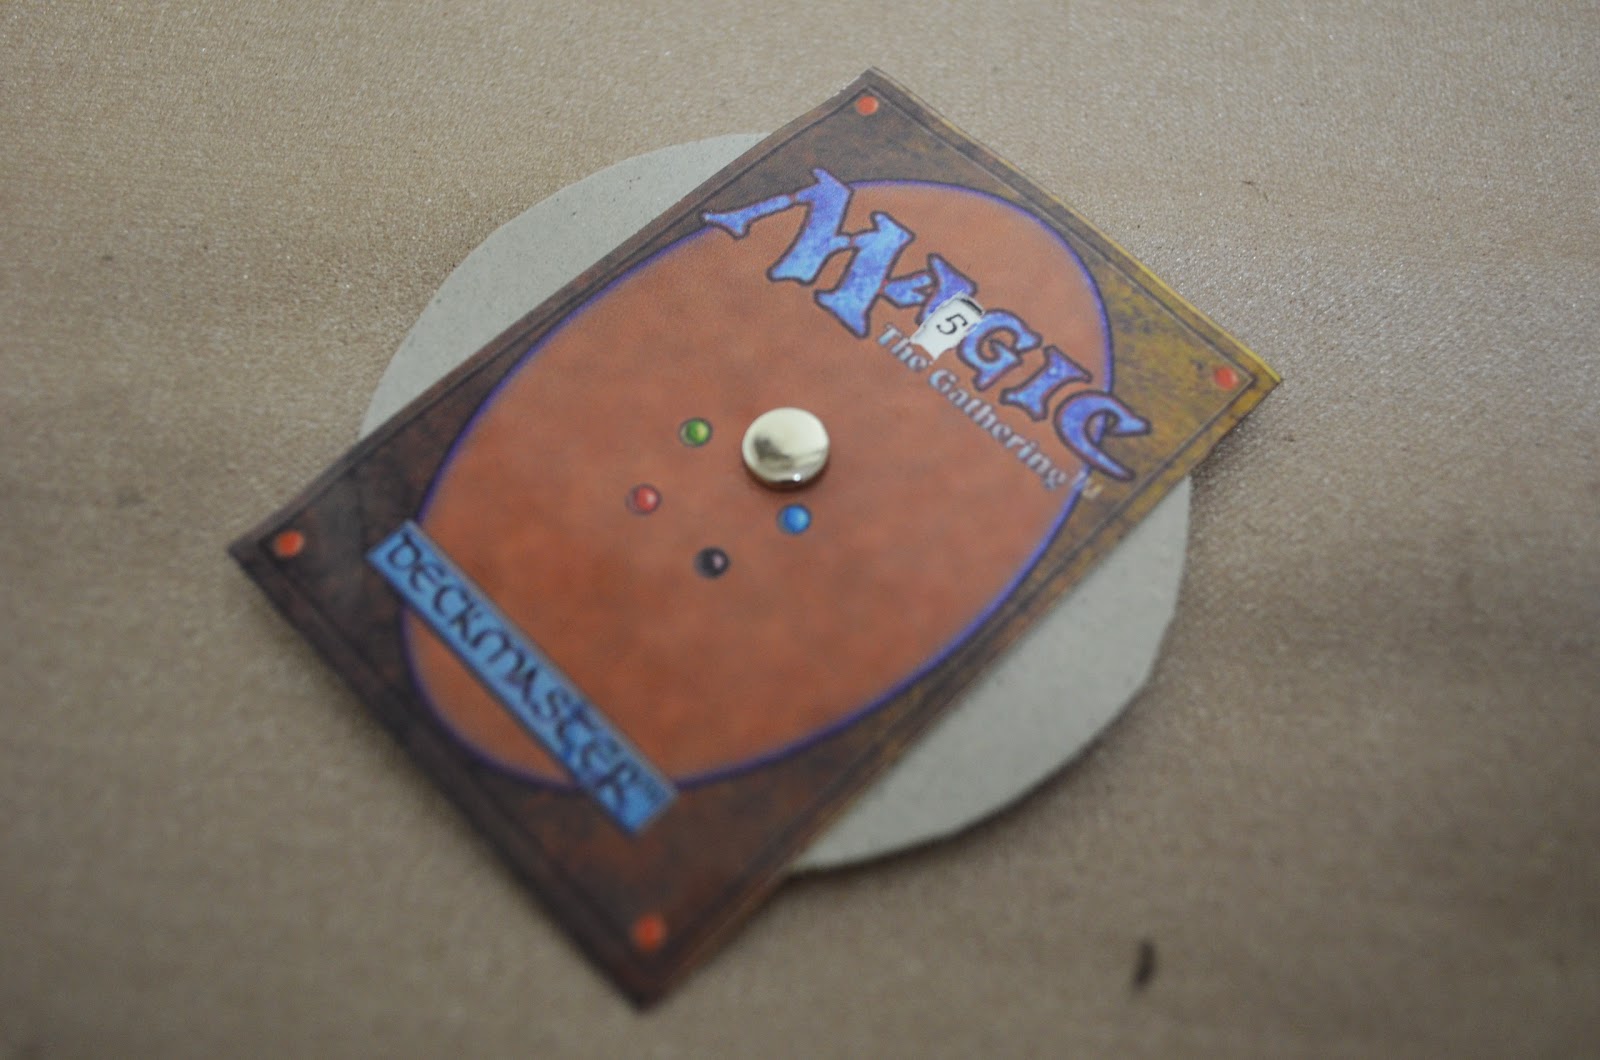
Basically, it's a $10 piece of plastic with a two dials. In my opinion- that's $10 I'd rather not spend. So, if you're sick of tracking you life with good old pencil and paper, here's the solution I came up with:


I used a piece of photo paper with the Magic card baking printed on it, box board, glue, a paper fastener, a copy of the dial (below), a ruler, and scissors.


It's pretty simple.


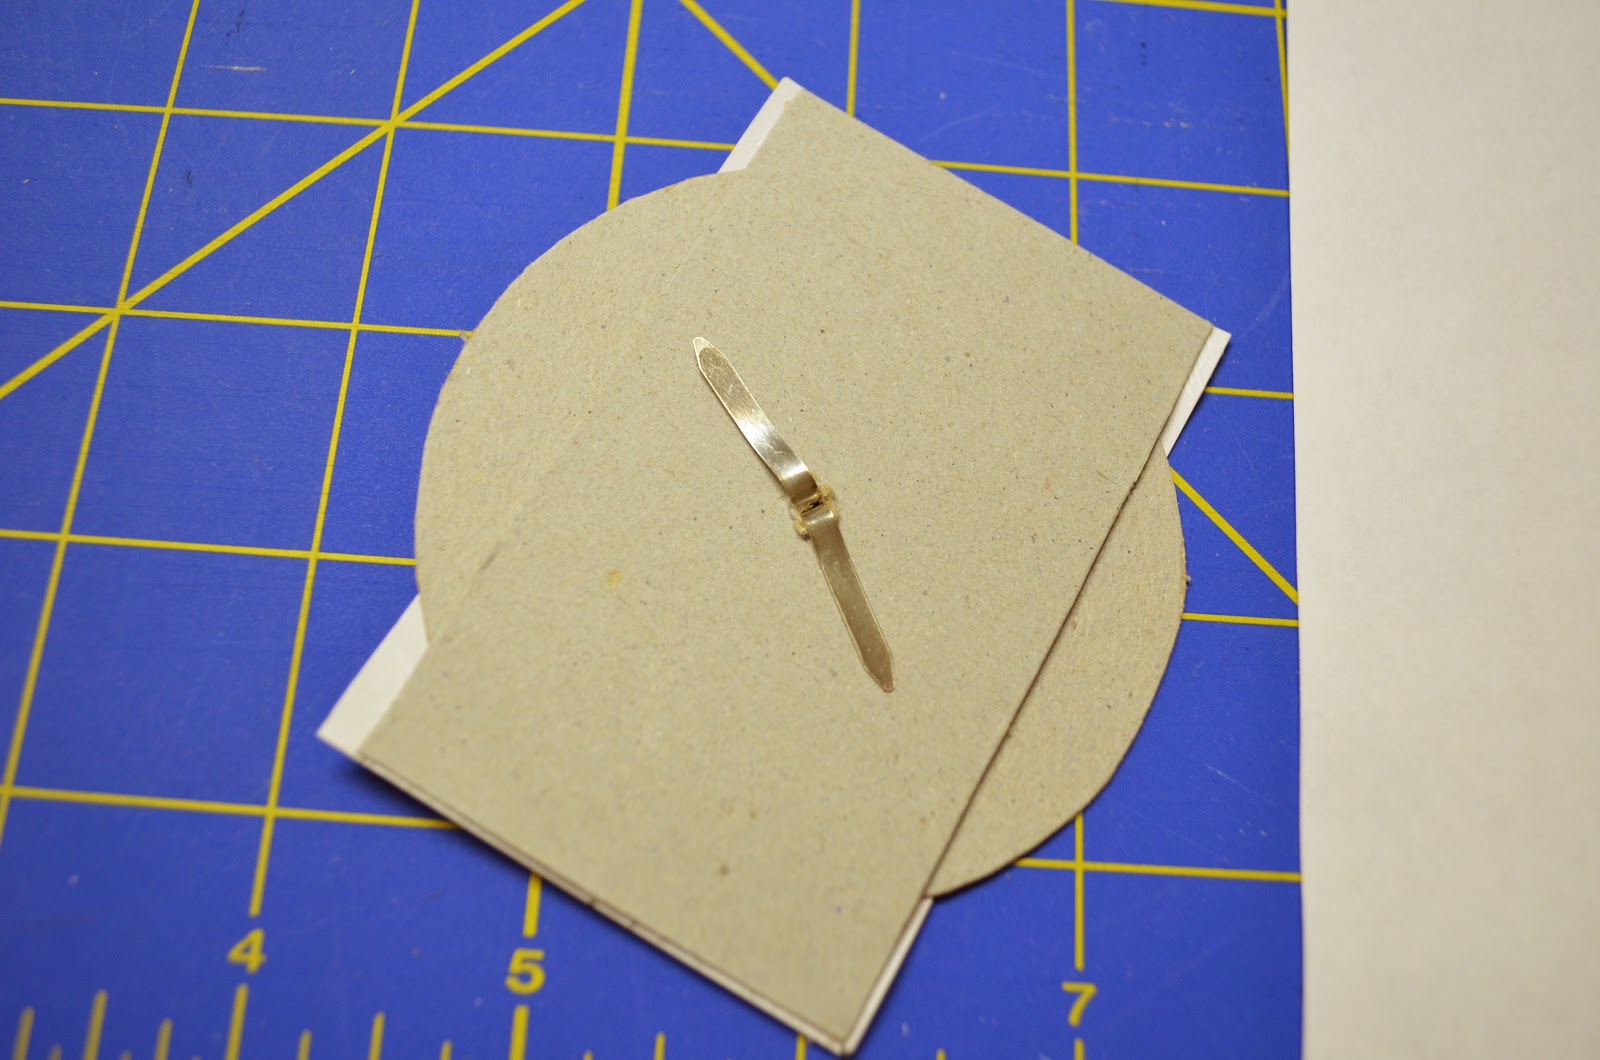
Cut out a piece of box board that is the same size as the card. Then cut out a circle for the dial. The inside circle on a roll of masking tape made for a good tracer. Make small holes in the exact center of each with the tip of the scissor.


Glue the center of the dial to the center of the dial. Obviously, I need to go back to the 8th grade and take geometry again- my "center of the circle" is not exactly the center!
Cut a small rectangle about a fourth of the way down from the top.


Stack the three pieces together and put the fastener in. Put a little glue on the top and bottom of the card, so it sticks to the backing. Make sure to not get any on the dial or it won't work!

Pretty simple, huh? XD


Wednesday, March 14, 2012

Pi Day Pie

Pi Day <3

I like to pretend I can cook, but I'm not very good at it. So, I came up with this super simple, but totally impressive, pie that anyone can make to celebrate everyone's favorite number.

You'll need one and a half cups of crushed graham crackers, one fourth cup of sugars, five tablespoons of butter, a package of your favorite pudding, milk, and some sprinkles.

Start by mixing the sugar and crushed crackers together. Stir in the butter.


The mixture will be kind of dry. Pat it into a glass pie pan.


Let it chill in the fridge for about an hour. Once the hour is up, prepare the pudding as the package says to. If it calls for two cups of milk, I suggest using only one and three fourths so the pudding is a little thicker.


Pour the pudding in the crust and stick back in the refrigerator for about an hour.


I created a stencil by printing and cutting out this image [Link] on card stock. When you lay the stencil over the pie, be careful not to push it into the pudding.


*Carefully* remove the stencil and you're done! Easy as pie! =p

Sunday, February 12, 2012

The Best Macaroni and Cheese Ever.

Those of you who know me, know that I am not exactly "skilled" in the culinary arts. This is a super easy recipe for some awesome macaroni and cheese. I made it last night and I ate a ton of it well I played Warcraft.
Ingredients:
4 ounces of Velveeta Cheese
4 ounces of Colby-Jack Cheese
½ Teaspoon of Onion Powder
½ Teaspoon of Salt
¼ Teaspoon of Pepper
2 Cups of Noodles
1 and 1/3 Cups of Milk
¼ Cups of Flour
¼ Cup of Butter

1. Get some water boiling and make the noodles by following the directions on the package.

2. Melt butter in microwave. Stir in onion powder, salt, pepper, and flour.

3. Heat the milk up in the microwave, not so it boils, but just so it’s not cold. Milk that is too cold with cause the butter to stiffen.

4. Stir the milk in, and stick the mixture in the microwave for one minute. Take it out, stir it, and stick it back in the microwave for a minute.

5. Repeat until it begins to thicken.

6.Then add the cheese. Microwave for a minute or until melted.

7. Stir in the noodles.

8. If you want, you can eat it like this. Or, I like to put it in a glass pan and stick it in the oven at 350 degrees for 20 minutes.

I think the recipe original came from a Betty Crocker cookbook. It’s one of my favorite meals! XD

Monday, January 30, 2012

Simple Felt Applique

I always enjoy adding my favorite characters to my work, but I am often intimidated by the fear of not getting my design to look just like the actual character. This method is quick and makes it easier to get a design that looks like the original.

You’ll need felt, sewing scissors, and a cloth marking tool.

Find a picture and print it to the size you want your appliqué.


Cut out the parts by color.


Trace them on the felt and cut them out.


Attach them to your project.


Easy as pie!

Saturday, January 28, 2012

"Bento" Snack Containers

Wow- it’s been a while since I posted. Sorry about that! Life kind of caught up with me. It was a busy week, but I really didn’t do much. Just a lot of practicing music!

Today, I thought we'd take a look at a recycling project.


Milk Jug Containers!
When I first saw these, I knew I had to make one because they remind me of bento boxes.


(Photo Credit to Adventures in Bento Making- it's a great site, check it out! Link)

Basically, a bento box is a Japanese lunch box. To make our “mock” bento box, you’ll need a cleaned milk jug, Velcro, hot glue gun, scissors, and a permanent marker. You may also want paper towel and bug spray.

Using the permanent marker and the pictures as a guide, mark where you will cut on the milk jug. The milk jug has four seams along the edges, and one seam along the bottom. It helps to use those seams as a guide for cutting.


Carefully cut along the lines. It helps to cut the handle off first.


If there is any permanent marker left- a paper towel, some bug spray, and a little bit of elbow grease will take it right off.

Glue on Velcro to hold the lid shut. Make sure to firmly hold the Velcro while the hot glue is drying, so the hot glue will better adhere to the jug.


Then, decorate the lid any way you want! I’ll do a little tutorial on how I did my design another day!


Fill with food and enjoy!


No, a traditional Japanese boxed lunch does not include Captain Crunch, but that’s all we had in the kitchen. XD

This is another idea from FamilyFun magazine. Link

Sunday, January 22, 2012

Ollie the Ugly Octopus


I made this super ugly-cute octopus (pentapus?... Oh, that doesn't sound right.) today. It took less than an hour and it was really easy! XD

What you need:
1 Glove (I suggest using an adult size glove.)
15-20 Random Buttons, 2 Matching Buttons
A Scrap of Felt
6-8 Plastic Grocery Bags
1 Rubber Band
Scissors
Hot Glue Gun

Pick out some buttons and glue them to the fingers of the glove

Fold a plastic bag in half four times.

Twist the bag.

Stuff the glove with the bags. I used one bag per finger, then a bag in the palm. It should look like a lumpy hand when you're done. XD

Glue the base of the pinky and the thumb together. You may want to use a rubber band to hold this is place while the hot glue dries.

Fold the cuff of the glove down, inside the creature.

Glue the cuff down, using a rubber band to hold it in place.

Cut a mouth out of the felt scrap. Then glue the mouth and the matching buttons to the body. And you're done!

This is based off an idea out of FamilyFun magazine: [link]